Dremel Tool Turnout Jig
Post 6 from my old blog - building hand made turnouts:
As mentioned in my last post, I have discovered that a Dremel type moto-tool makes an excellent point shaping tool for constructing model railroad turnouts. Combined with the simple jig below I found the process to be much easier and faster than the traditional filing method.
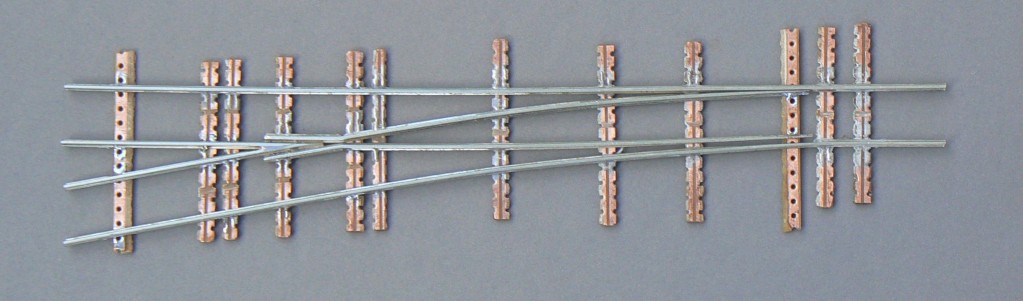
Here is a picture of the completed unit:

The idea is that rail is placed upside down between 2 aluminium strips that secure it tightly. This holder is then mounted on a slide that moves past the Dremel tool. The holder can swivel to create different angles. I use No. 409 cut off disks to cut and shape the rails. Points, stock rail notches and frogs can all be made with this jig. (Read more)
Turnouts 4 and 5
Post 5 from my old blog - building hand made turnouts:
A few days after that router episode I hit on the idea of using my Dremel Tool to grind the turnout points. I probably would have thought of it earlier but I only just got the Dremel for Christmas and wasn’t really up to speed on it uses. I quickly grabbed a short piece of rail, put it in a vice and stuck a No. 409 grinding disk into the Dremel. Success! Time to make another jig!
I also decided to take the plunge and buy some supplies to build proper turnouts and ordered some MicroEngineering Code 55 rail and flextrack, as well as some PC board ties for sleepers, and some track gauges.
While waiting for the new rail to arrive I practiced making turnouts with the new turnout grinding jig - which worked rather well. A lot less stressful and quite quick too. I managed to cut the pieces for turnout number five in about half an hour and with practice I am sure this will get better.
When I get the time I will post a step by step guide of how I make my turnouts and some of the tricks I have learned. There are plenty of websites that show how to do it and my method is really just a variation on this. But did I mention my grinding jig works ‘great’!
A Turnout Jig
Post 4 from my old blog - building hand made turnouts:
After building 3 turnouts I have been thinking a bit on how to speed up their construction. By far the slowest - and hardest - part is filing the 2 switch rail points and a corresponding notch on the stock rails. It’s also quite stressful and easy to mess up.
My first idea was to create some sort of jig and use a wood router to grind the rail to a point. This might seem strange but I have accidentally routed straight through a nail while cutting slots in wood on several occasions without much ill effect to the router bit, so it seemed quite a reasonable idea at the time :-) (Read more)
Turnout 3
Post 3 from my old blog - building hand made turnouts:
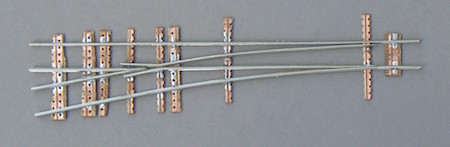
Here is a picture of my third effort. Still not too bad but realistically not much better than the first:

The soldering is a bit better but I goofed a bit here. Trying to improve my soldering I used some flux but since I didn’t have any electrical type flux on hand I used some Bakers Flux instead. This ‘worked’ but it is strongly acid and would probably corrode the joints after a while. I went out to an electronics store and got a flux pen for my next efforts.
This turnout took at least 4 hours to make, which is still way too long. Hopefully with a bit of practice I can get it down to under 2.
Turnout 2 was a disaster. I tried to rush it way too much and stuffed up completely. I ended up using it to practice cutting electrical isolation gaps in the rails with my Dremel tool.
My First Hand Built Turnout
Post 2 from my old blog - building hand made turnouts:
Well it took a while - at least 6 hours spread over a few days - but here it is. I think it isn’t too bad for a first effort.
I know it looks as ugly as sin, but this is just using what I had on hand, to see how hard it is. All I used was code 80 rail from an old piece of flextrack, a file, some Veroboard, a soldering iron, and callipers to get the track spacing correct.
Most of the ugliness comes from the veroboard used for the ties and my lame soldering efforts - I hope! Anyway, when it was finished I hooked it up to some flex track and pushed a piece of rolling stock through and it worked fine. (Read more)
Some Posts From My Old Blog
As I mentioned in my first post, I had an earlier blog with a number of entries about building handmade turnouts. Unfortunately the blogs’ Wordpress database got borked so I had to start again, but I did manage to retrieve many of the posts.
So without further ado I’ll put them back up.
Post 1 from my old blog - building hand made turnouts:
Even though I have been interested in building an n scale model railroad layout for quite a while now, what really got me interested again were sites like this or this and especially this guy have been building their own turnouts.
They made it look rather easy and they certainly look much better than store bought turnouts, so I was determined to give it a try. This also fits in with my interest of doing as much as I can rather than buying it.
So over Christmas I gave it a go. Armed with a new file and some old code 80 flextrack I began my first adventure into model railroading…